Today I am going to share some new before and after (progress) photos featuring projects we’ve worked on in our entry and living room area! The before photos are from when we moved in not quite three years ago (we bought this house furnished!)
We made a few updates during the renovation last year and some I haven’t shown you yet, including enlarging and casing in openings between the rooms, changing flooring and replacing carpet on steps, moving a doorbell and replacing a not-cute return air vent. I’ll share them today!
Of course needless to say we will continue to work on details and furniture over time so this isn’t really “after” …. but I hope you all enjoy seeing the progress we’ve made so far!


One of the things I loved about this beach cottage when we first saw it three summers ago was how it felt to be in it. Even as we walked inside the small entry and living room for the very first time it felt instantly welcoming and cozy. We knew within minutes and a quick walkthrough it was a place we could make our home. It was the kind of beach house you’d want to come hang out in and not leave. And that it is! We are so grateful that it is now our home.


I loved that this house was built in a classic style and that the previous owners had added more character to it! That is just the kind of home we were looking for — one that felt like home to begin with but one that we could continue to work on and make our own.
While we didn’t actually plan to do much right away, we knew we would eventually take out carpet and replace flooring. Of course, we did a little more than that :). That’s just what I do, I guess ha.
Here are some of the before and after transformations we’ve completed so far in this area of our home!


A cased in opening
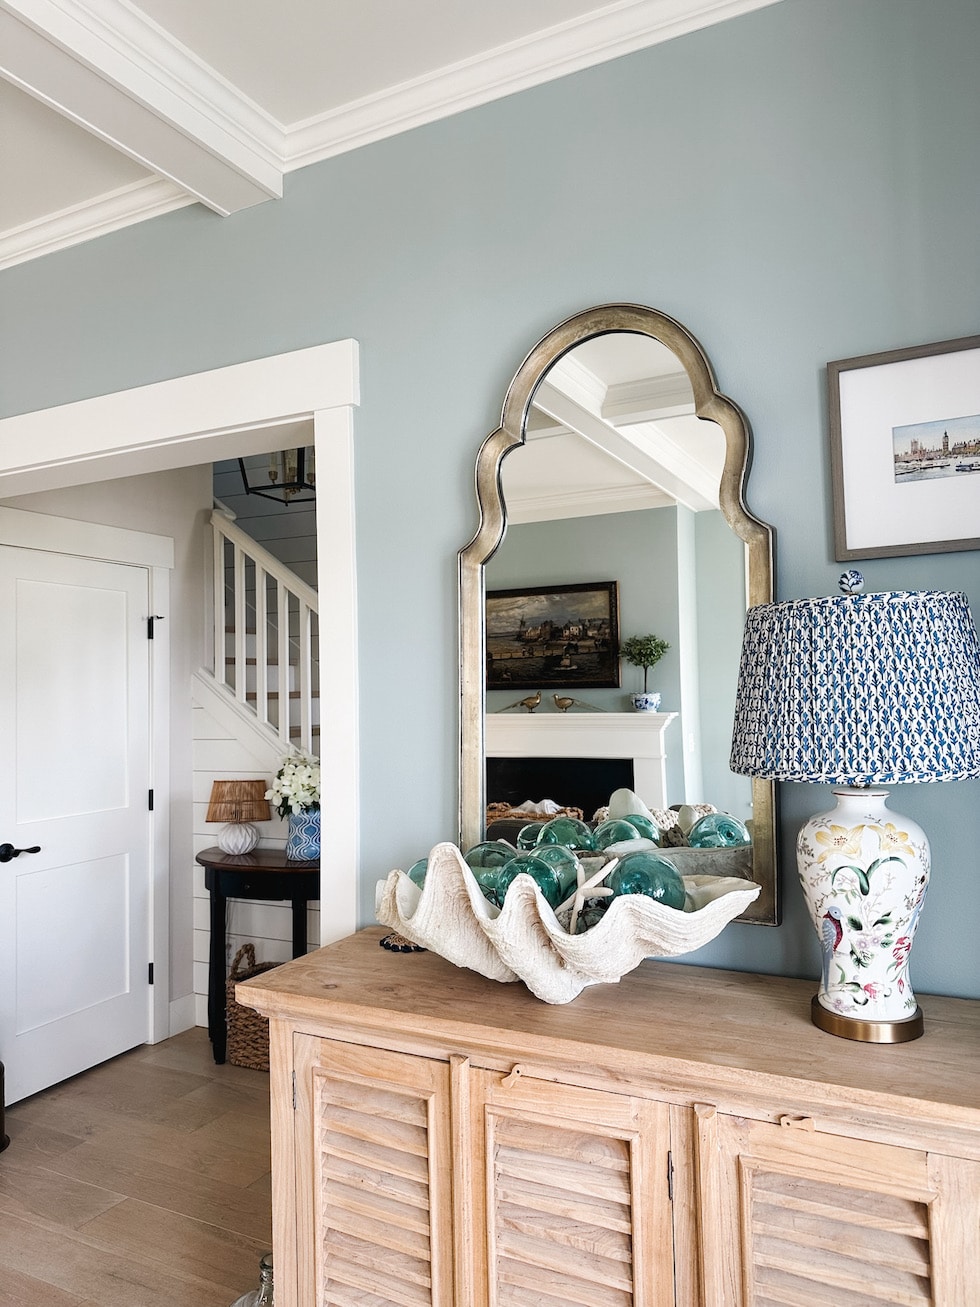
One of the things we decided to do in our renovation was to case in the “opening” between the entry and living room (which we also did in the other rooms on the main floor, but that’s a post and photos for another day).
You can see how before it was just drywall. This opening couldn’t be raised or made larger. In fact, we actually “narrowed” this opening slightly to make room for the casing, but you don’t even notice that it’s smaller. It just feels nice to have it all cased in now — it really makes it look more finished and classy I think!


New hardwood floors and stair treads
We also had the staircase carpet removed and added hardwood treads. We’ve always removed the carpet from every staircase we’ve ever had, it is such a nice fresh feeling to have painted steps or hardwoods. We may add a runner at some point, but we do like it as is!


While we originally thought about just painting the steps, since we were installing the new European White Oak hardwood (engineered) flooring upstairs and down, it made sense to do it all and just make the staircase match the new hardwoods.
We chose this tone of flooring throughout because it is a timeless style but also because it ties into the color of the beach sand and driftwood! It adds light and feels casual and welcoming but still classic.


One thing we love about having a smaller home is we can focus on the smaller details, too. That’s really what I love to do the most. It’s nice to be able make simple changes and see the impact!


Swapped the ceiling air register
A charming update we made last fall is hardly every seen in a photo (it’s an awkward angle to get into a photo) but we see it every day! We swapped out a regular not-attractive return air vent for this adorable star burst pattered vent! I can’t even believe what a difference it made. It’s so cute (if an air vent can be cute?).


Changed the floor heat registers
We used to have the typical metal heat registers but once the wood flooring was installed I knew immediately I would not want to put the metals ones back on the main floor (we’ll change the upstairs in the future). We bought THESE from Amazon but our flooring contractor made some adjustments to make them fit properly. I love that they are now wood and blend in to the flooring. I can’t wait to be able to do the same upstairs someday.


Wired in sconce and moved the doorbell
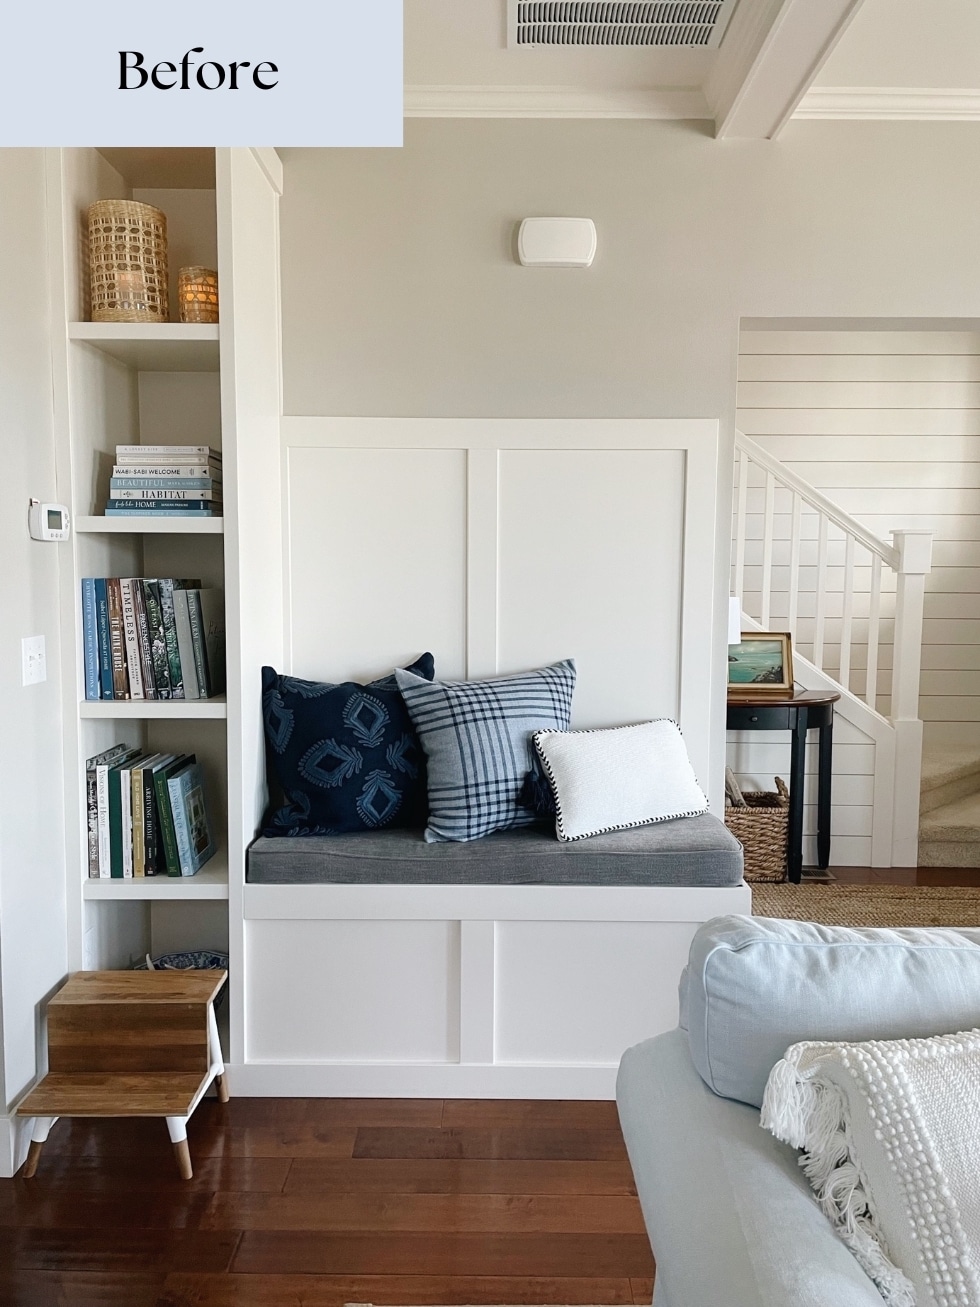
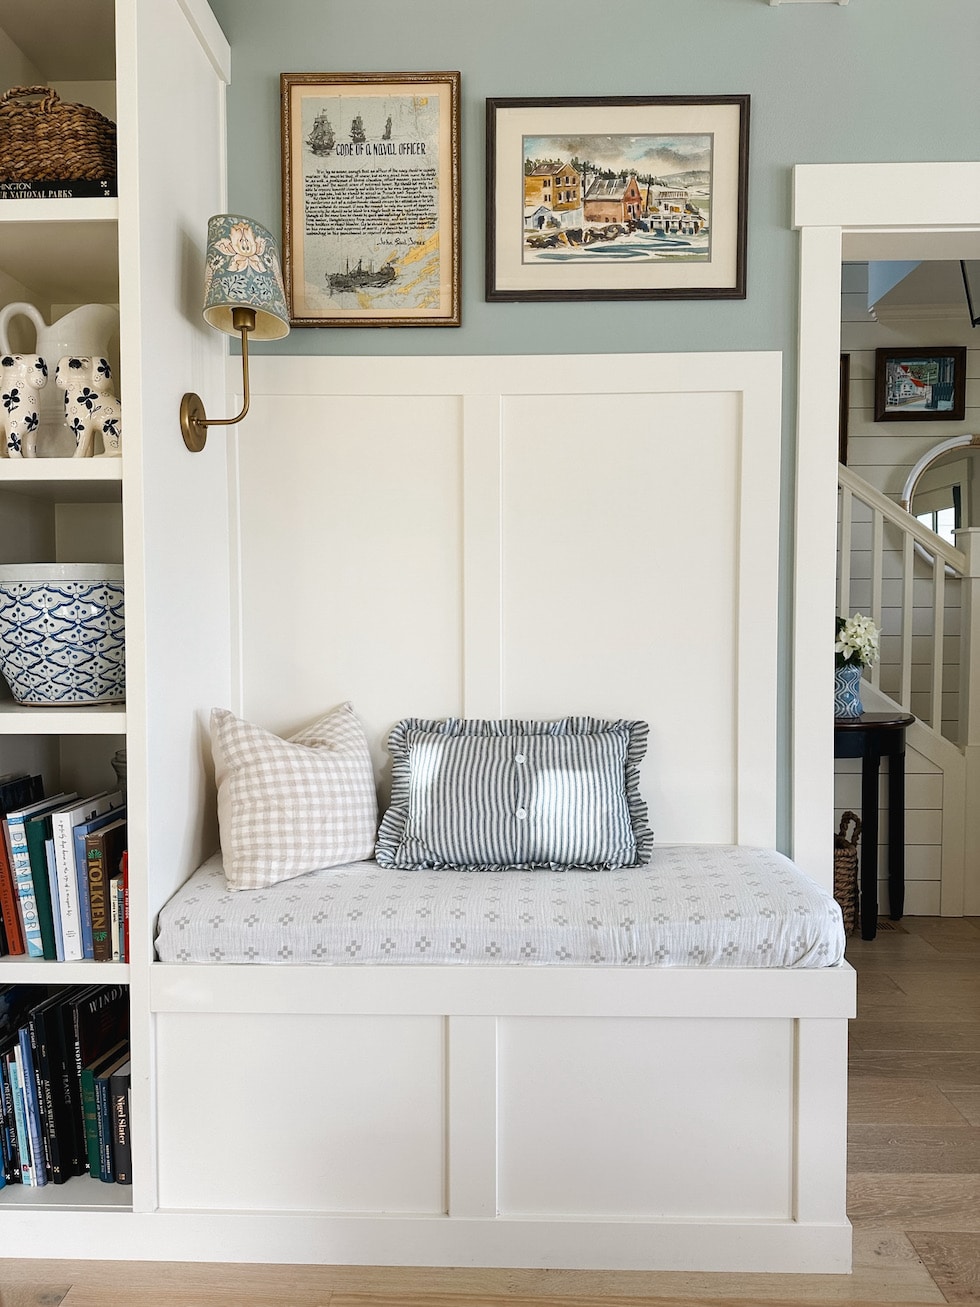
We had added the brass wall sconce here previously, but were using a battery operated bulb. While the electricians were here we had them wire in the light so now we can turn it on with the flip of a switch! We also swapped the lampshade for this patterned one. Then we also had them move the doorbell. It used to be above the bench where the artwork is. You might remember that we had added a cute enough cover over the original one, but the placement still limited me from hanging certain art pieces. So “as long as” we had electricians here for the renovation, we just had the whole doorbell moved into the closet behind the wall. 🙂


The plan for the bench cushion
The previous owners had added the built-in bench in the living room which we use as extra seating all the time when people come over! It is so handy! It takes up less room than a chair (or two) and provides handy storage as well.
My plan is to have the cushion recovered but for now we just wrap it in this reversible blanket and it works just fine. I like to take my time and not feel rushed to make a decision before I’m ready. I know I will recover this one in a coordinating fabric when I’m ready to have the official bench cushion cover made for our dining room, which we also just wrap in blankets for now. With grandkids and pets, easy to wash blankets are the probably the way to go anyway!


Fresh Paint
We had the whole lower level interior painted during the renovation. Unfortunately there were a few situations and mishaps (in every room) that need to be redone. It’s a long story but I’m hoping it will be resolved this summer. Not everything goes smoothly or according to plan, which can be frustrating when you’re spending your hard earned money on big projects, but we’re trusting that our contractor will be able to make it right! I’ll share more on that soon.
An upcoming paint change we plan to make ourselves is to give the inside and outside of our front door a new coat of paint.
If you see the reflection in the mirror of some of these photos, you will see the interior of the door is currently white with samples of dark paint! Does that surprise you? I love contrasts in small doses. I am considering an interior door color similar in depth to the Dutch door in our last home in a deep blue or a deep green blue. But the outside will likely remain the same or similar color because I love it. We’ll see, you never know what might happen :).
Paint colors: Door is Wythe Blue Benjamin Moore, Living room is Beach Glass Benjamin Moore, White walls and trim are Classic Light Buff Sherwin Williams, and Entry walls are currently Neutral Ground Sherwin Williams.


Other upcoming ideas and changes:
We have a creative idea for our entry, it’s something I’ve wanted to do for a long time. I found just what I needed at at great deal via a friend who was selling that very item on Instagram. I just have to go get it next time I’m in Portland and then I’ll share about it!
I’m also on the hunt for a new entry rug. While I will say I love the look of no rugs in summer for the simplicity of it, as a quick sweep takes care of any sand and it is fresh and clean again, it’s nice to have a little something for a splash of color or texture. And once we get into fall and winter again a rug is nice not only for the coziness but to catch the rain drops when people and pets come in.
The demilune entry table was here when we moved in and it fits perfectly (here’s a similar table). I may decide to give it a new coat of paint, but I also might just get something new in time. The table has a teeny drawer that holds our doggie walking bags :), so it’s handy!
And as I’ve mentioned, we are excited about getting furniture for our living room, but we will take our time on that as well.


Changes we made prior to the renovation:
The first thing we did in our entry before the renovation even began was to determine the overall mood we wanted to welcome our family and friends. I always love a mix of classic traditional and fresh casual coastal style and that style really works well here.


Before we even knew we would do the renovation we got settled in and started making it our own. We hung several of our original seascapes on this stair wall. Since we’ve been collecting art for many years, this was an easy way for me to set the mood and add color and personality.
Then we installed this navy lantern! I love the classic character and statement it makes in the entry. I would love to buy another for the top of the stairs! Saving my pennies.
Home takes time! It’s fun to see progress being made and we always have plans to look forward to!
Want to see more before and afters of our home? Check out this post: Our Kitchen Before and After (with photos of the kitchen and dining room swap!)
Be sure to subscribe to my emails so you won’t miss future house updates! I send out one or two a week with free decorating tips, my favorite home decor finds and links to new posts, so if you don’t receive them, put your email address in here!


