In 2022 when I was in France working with furniture conservators Nelly Koenig and Marine Prevet at Atelier Kopal, they had a large mid-century French cabinet in the workshop. It had been attributed to Louis Sognot, a prominent figure in modern French furniture design from the 1920s into the 1960s as well as a professor of decorative arts at the Ecole Boulle (premier furniture-making school in Paris).
This cabinet from later in his career was obviously in need of at least a clean, and it had a fair number of scratches and other minor damage. You can see here what it looked like after we brought it down for inspection.

At first glance the piece looked very pale and cloudy, and the grain was somewhat muted. I considered briefly whether that may have been the original intention, but once we opened the doors it was clear the veneer inside the cabinet was a slightly darker, richer color than the exterior.
The instinct here is to assume that the timber on the outside of the cabinet had been bleached by UV, or sunlight. This is very often the case, where the natural dyes or pigments in a piece of timber are literally destroyed by energy from the sun. For more details on this phenomenon, see Jeff Jewitt’s great article on light and wood.
In fact, some of the most beautiful wooden surfaces in my opinion come from 1600s English walnut pieces that have naturally bleached over the centuries.
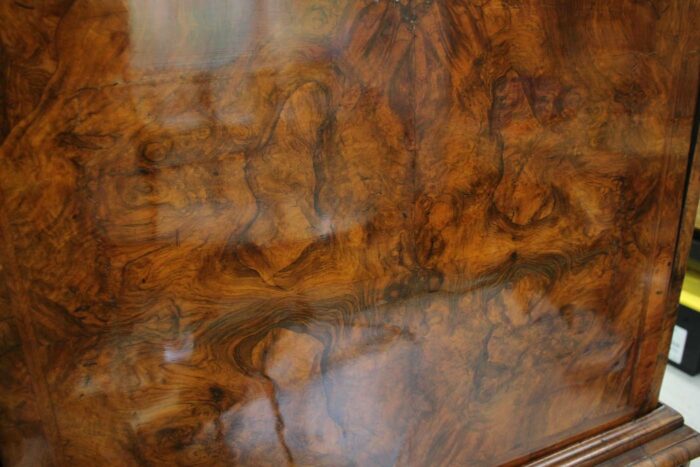
If the wood has bleached in this way (and you want it not to be), you may decide to strip the finish and either bring color back into the surface or sand through the degraded wood until you get color again. There are always different opinions about what is right.
However, if you had done that in this instance, while it would definitely have “worked,” you might have missed one of the actual reasons the wood looked as pale as it did.
“Regenerating” the finish
In the end, we didn’t remove the coating at all. Atelier Kopal had a strong conservation stance of trying to preserve as much original material as possible. Sognot had a willingness to incorporate a variety of new and old materials into his work (including finishes specifically developed in that time), and those material choices themselves have their own significance; so they wanted to preserve the original coating. This approach follows an old principle of minimum intervention in conservation treatments, which ultimately means you avoid stripping and sanding a piece if the problem that needs solving doesn’t actually require that aggressive of an approach. (Jeff Jewitt has another great article on ways to revive finishes without stripping them.)
Following the research of Heinrich Piening, the head of furniture conservation at the Bavarian Palace Administration in Munich, they applied a suitable solvent mixture to swell the finish. Then, as the solvent evaporated, the finish could settle again and resaturate the surface.
After two brushed-on applications, I was shocked at the clarity and color that started to return to the doors.
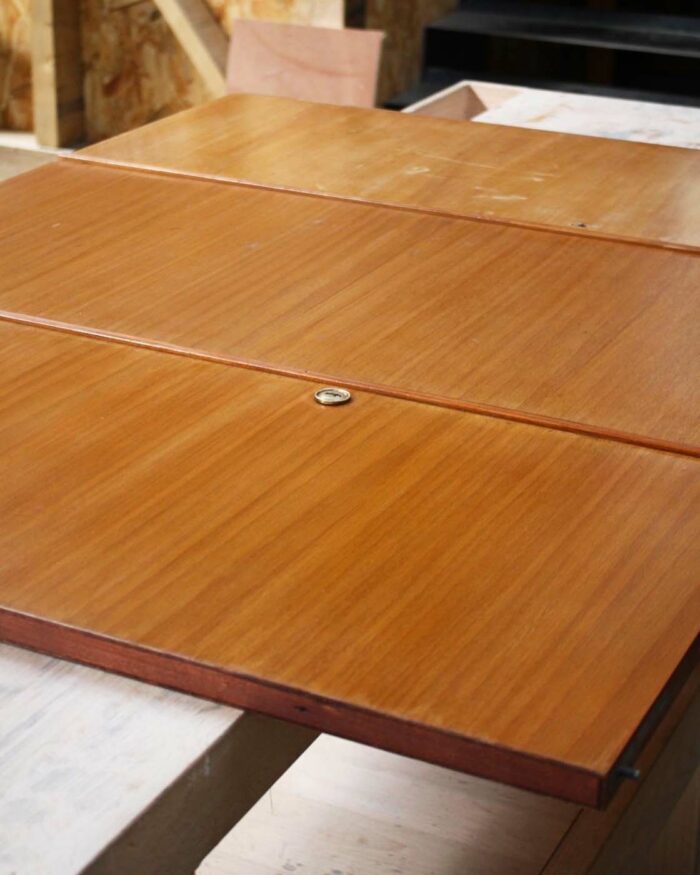
Understanding cloudiness
I want to talk about what happened here, and why this seemingly hands-off approach led to such a distinct visual difference.
Some of you may already be aware of what was going on. You may have faced it in your own projects. If you’ve ever applied a shellac or lacquer coating on a humid day, you may have returned to your project to find it looking, well, cloudy and pale. Products like Mohawk’s No-Blush are designed to fix this problem in pretty much exactly the same way we treated the Sognot cabinet.
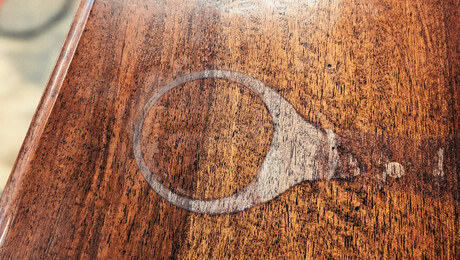
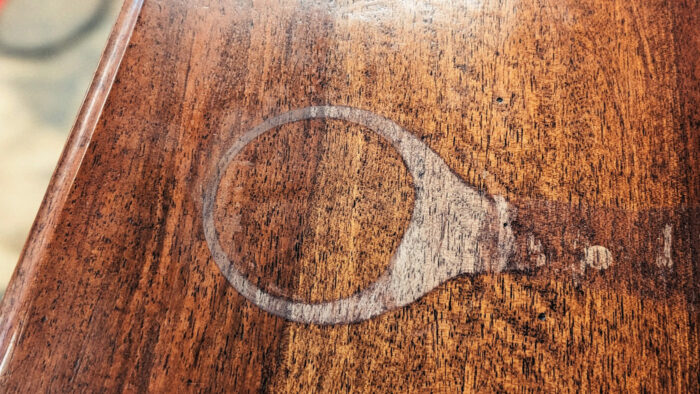
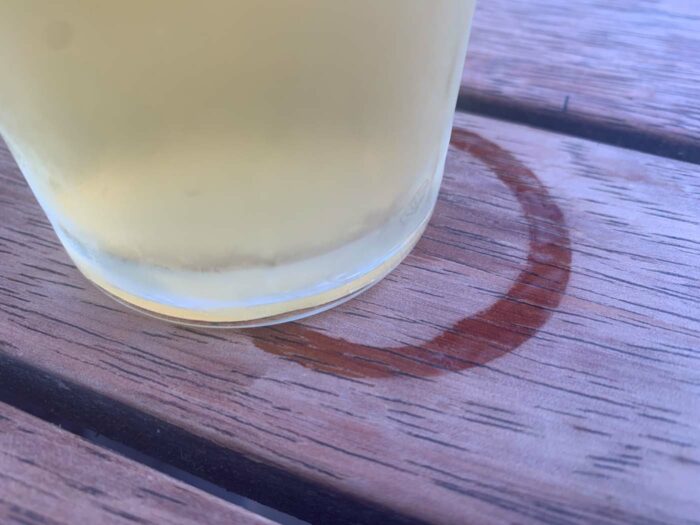
Even if that hasn’t happened to you, you must have seen a white ring in the surface of a piece of furniture that was formed after a hot drink was placed on it without a coaster.
We actually had a piece come into our workshop not too long ago—a table on which a tablecloth had been steam-ironed, which led to a cloudy, pale surface.
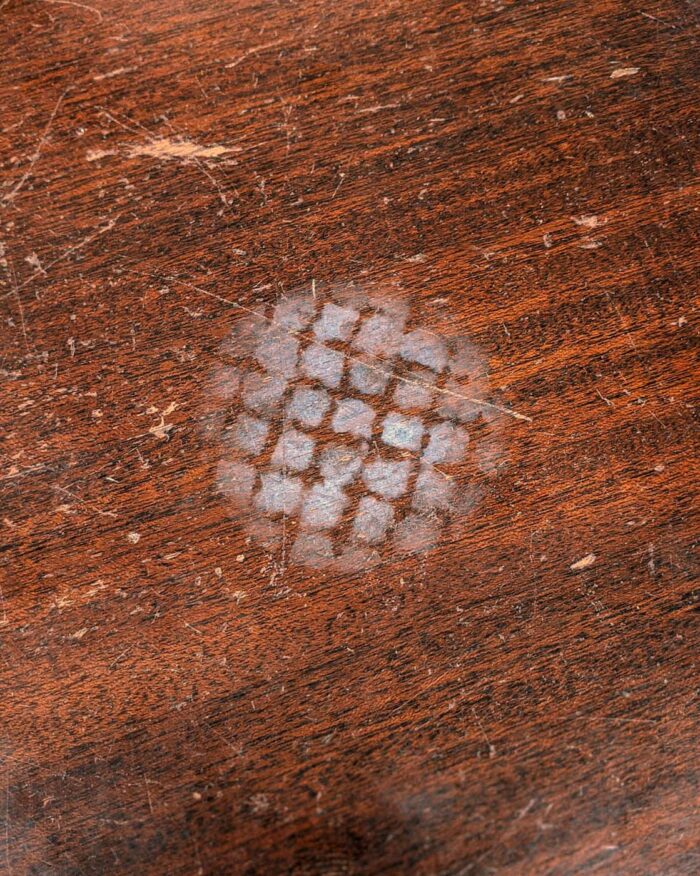
Apart from No-Blush and other solvent mixtures, there are a number of home remedies, cooking oils, and even professional revivers that have been used to make this problem go away by penetrating the coating and filling the losses. I believe Liberon’s Ring Remover fits into this category, and another one I have heard of and unfortunately seen used is mayonnaise. Rub some mayonnaise into the surface, let it sit, clean it off, buff the surface, and suddenly the problem is gone. However, in the piece that showed up in our shop, they forgot to do the clean-it-off bit.
This will definitely make it look acceptable for a little while, but I have some concerns. To address them, I’d really like to talk about exactly why this pale cloudiness appears, and why these solutions “work.”
How our eyes see white
You may be familiar with the idea that white light contains all the colors. The simple explanation goes that when white light, such as that from the sun, hits an object, some wavelengths are absorbed and some bounce off. If an object absorbs all wavelengths other than red, then red bounces into our eyes and we see the object as red.

So theoretically, if all the white light bounces off, we should see white—except if all light bounces evenly off of a surface, that surface becomes a mirror. I’m certain that if any of you look at the backs of your chisels, you’ll see exactly what I’m talking about (if you’ve been good).
So then, how does white exist?
The answer is relatively simple. All of the light needs to bounce back to our eyes, but not evenly. The light gets all mixed up in the material. It all comes back, but it comes back jumbled. The reason PVA glue, or milk, or even mayonnaise are all white is because light enters them and gets jumbled up inside before reflecting back out into our eyes.
It’s why clouds are white as well, when the water vapor is spread out in the air and the light keeps changing direction as it passes from water molecule, to air, to water molecule, etc.
And if you still aren’t convinced, take some sandpaper to a piece of clear plastic and have a look at the surface and the dust that forms.

How cloudiness appears on furniture
In an ideal coating on a piece of wood, the light passes cleanly through the finish and reflects off of the wood, giving us a crisp and clear image of the wood in our eyes. However, if there are imperfections in that finish (like tiny cracks and gaps) or water molecules dispersed in the finish, the light starts changing directions or getting diffracted. If light gets jumbled up as it passes through and back to our eyes, we’ll get a pale, cloudy version of the color of the wood. If there are enough imperfections, a lot of light will never make it to the wood; instead, it will be reflected back into our eyes in a jumbled form, appearing white.
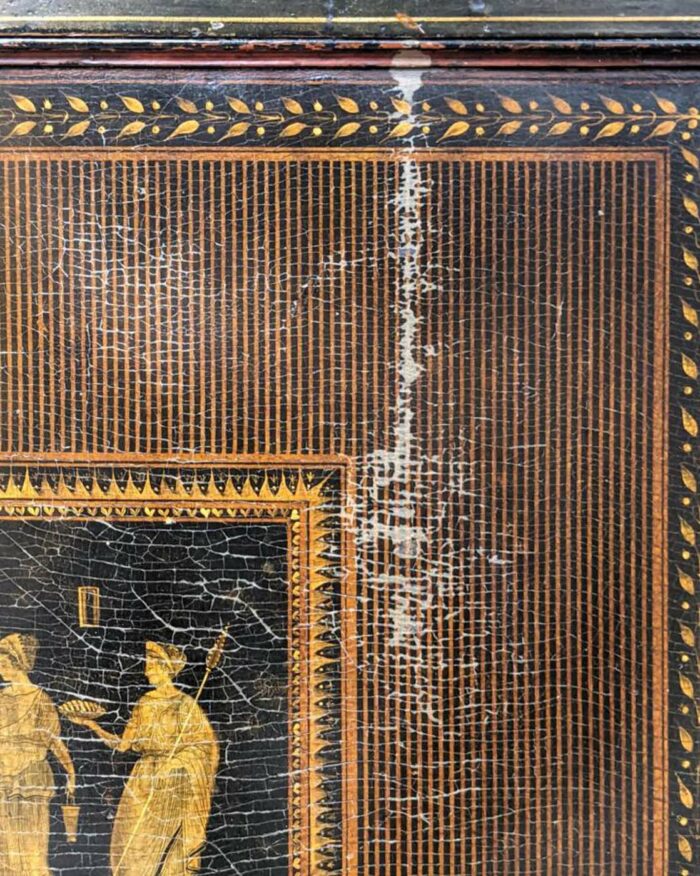
In the case of white rings, the theory goes that water vapor from a hot drink has penetrated the finish on top of the wood and either stayed dispersed in the finish (like a cloud) or eventually migrated out, potentially leaving tiny little cracks or gaps in the coating layers or between the coating and the wood.
But there are other ways this can occur. Certain film-forming coatings that build up on top of a wooden surface can start to detach from the wood, or even from lower layers or seal coats. The bond between the coating and the wood breaks down in tiny little areas and will create these little gaps. Or lower coatings break down, doing much the same. Some coatings that don’t allow moisture to escape from the wood on dry days will be prone to this as well, when that moisture gets trapped beneath them. Heat, UV light, or some other factors can cause damage to the coating itself that encourage these little imperfections. In the case of black East Asian lacquer, UV and moisture create tiny microcracks on top of the coating, which cause it to appear cloudy and pale as well.
Regardless of the cause, the result is that the film coating either contains dispersed water molecules or has started to form tiny little gaps and cracks, which makes everything look pale and cloudy.
How some techniques resolve cloudiness
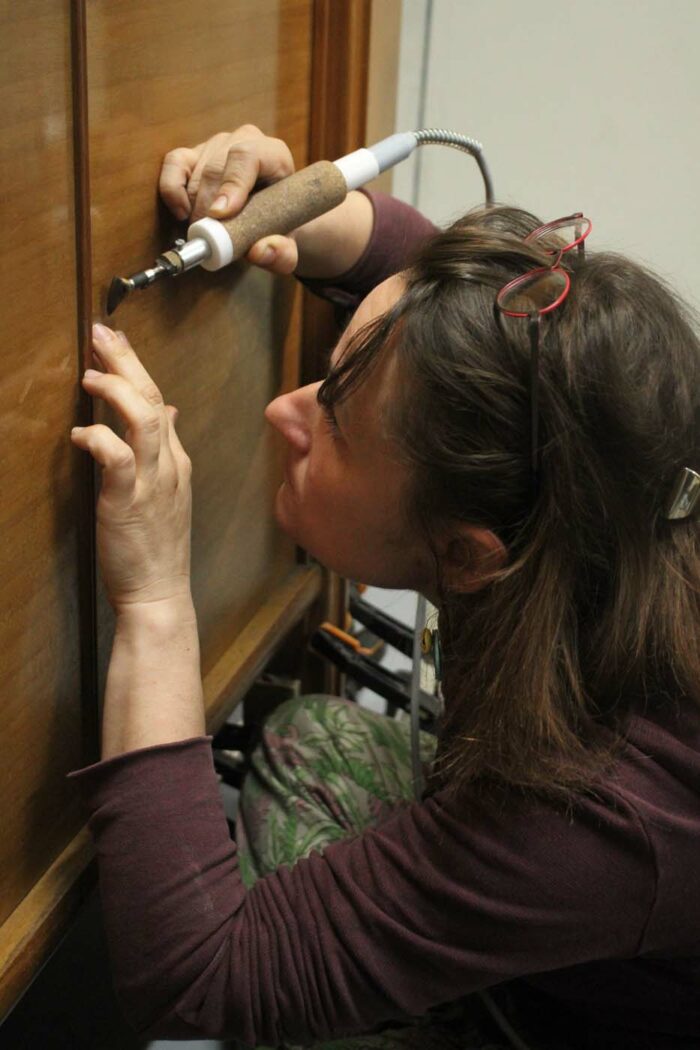
This is what likely happened to the cabinet I worked on in France. It was believed the coating was a modified nitrocellulose lacquer that had started to degrade and detach from the wood with the aid of UV damage. By softening that coating with an appropriate solvent mixture, it is theoretically possible to resettle and resaturate that surface. The paleness and cloudiness are gone because the gaps, imperfections, and any water vapor trapped inside are now gone.
If you are a French polisher, you know that you can often do a pass with alcohol in your rubber after cloudiness has appeared to do essentially the same thing.
Another technique that often works is heat and pressure. You may have seen it suggested that a hot iron on a cloth (without steam) can make white stains go away, and they absolutely can on certain finishes. They achieve this by helping water evaporate out of the coating, and they may also potentially warm and soften the coating, compressing and re-amalgamating it to remove any gaps.
Success! No more white rings. (NOTE: There’s an old technique called “flashing” that also works similarly, but I won’t formally recommend it here.)
These first two solutions involve getting moisture out of the finish and helping the original coating re-adhere and close those gaps by itself. Stripping and refinishing the piece will also obviously solve the problem, because the problem is in the finish and not the wood. It’s aggressive, and sometimes more effort than necessary, but it definitely works.
The other solution is to force the moisture out by filling those gaps using another material. This is where a lot of our other home remedies and revivers come in. Rubbing all kinds of oils into the surface often works quite well because the oils will push moisture out and penetrate those little gaps and fill them. It will look really good after you’ve done that because now the light can pass through the coating and reflect off the wood similarly to how it used to. However, whatever material you’ve added is now likely trapped either in the coating or between the coating and the wood. In many cases, especially with oils, that material is also penetrating into the timber itself.
In my training, we were shown how to do this intentionally with a conservation-grade and highly stable acrylic known as Paraloid B72. I have used a few other synthetic and natural resins as well. If I can, I try to use materials I trust will not cause long-term damage (as far as I know). My suggestions, and over-the-counter products that resolve this, contain linseed oil usually in combination with an acid (like vinegar) and a wax (which buffs up nicely) as well as some solvents. A lot of the home remedies involve cooking oils rather than linseed oil. Mayonnaise in particular, while it sounds silly, actually contains oils, proteins, and an acid (like vinegar). So it’s really not as removed from many of the “revivers” in traditional restoration workshops as it seems.
Mayonnaise?
I’m not here to dis on home remedies. A lot of home remedies are really clever and effective, and the work of finding simple and affordable solutions to common problems in the home is a noble pursuit that I think gets looked down on too often. A spit clean, for example, is an extremely effective and affordable technique used both in homes and the finest of conservation labs. The mayonnaise technique in particular, in my opinion, has a certain cleverness and resourcefulness to it as well, which I admire.
Coincidentally, the first time I saw someone make mayonnaise from scratch was actually the final week of my time with Atelier Kopal. It sounds very stereotypical, I know, but we were preparing fresh escargot, and Marine was making mayonnaise from scratch for it. She demonstrated the way the oil is emulsified with egg yolks and a small amount of acid by frantically whipping the mixture with a fork while adding oil and creating an oil-in-water emulsion. (Emulsions like milk and PVA glue are almost always cloudy and pale, and I’d love to explain why, but we’ve probably hit enough topics in this post.)

Eggs themselves are used historically in a number of materials that have the capacity to hold up for a long time. They’ve been used as adhesives and paint binders for thousands of years. Egg yolks with a little acid and pigment is the basic recipe for an egg tempera paint, which has incredible longevity in the right conditions. Last year when visiting the Harvard Museum, Alex Chipkin showed me a 15th-century painting of Christ that had been made with egg tempera on gilt wood, with a quality as rich as I could imagine.
Most historic oil paints are made from linseed oil, of course, and there are recipes out there for egg-tempera/oil paint blends, which are really not all that different in their ingredients from some home mayonnaise products.
One big difference is that egg-tempera/oil paint blends are usually made with a drying oil (linseed oil), and mayonnaise is not. Another is that mayonnaise is emulsified in water, which the paints are not. Finally, mayonnaise often also contains other flavors, like mustard, as well as preservatives (which frankly seem unnecessary for furniture).
My problem with mayonnaise is not that it’s a “gross” food product. The reason I don’t use it is actually very similar to the reason I don’t use any other oil or oil-based reviver.
Why don’t I use any oil-based revivers (including mayonnaise)?
Let’s step back a second and think about the problem we are trying to solve.
The cloudy and pale imperfections in coatings are caused by tiny gaps and moisture in the film-forming finishes. If the moisture is pushed out and the gaps are filled with materials that have similar optical properties to the finish, it’ll become clear again. This means that whatever material you use has to also push through the finish and fill those gaps.
When it comes to filling gaps, what you fill them with will only work as long as they stay in the coating, permanently impregnating the surface with this material.
If I am going to use this technique, what I want are relatively stable materials that will adhere well to the finish and not soak into the timber or eventually migrate out of the finish, leaving the gaps again later on.
Both the food oils in mayonnaise and the drying oils in many revivers will soak into the wood if they make it through the finish, and they can auto-oxidize or deteriorate. Food oils will go rancid if oxygen can get to them, then break down into smaller molecules that could either migrate out of the gaps or encourage bacteria or fungi growth, or lignin degradation. Linseed oil, of course, may potentially harden in the wood and age, which has its own impacts on the wood.
Even if we don’t yet fully understand all the ramifications or processes involved, the result is that the material I’ve just forced into my furniture is going to age differently from the area around it. And some of the ways these materials age will permanently affect the wood and the appearance.
I have seen instances of wood darkening where oils have penetrated the finish. Back at West Dean we had a guest tutor, Paul Tear, from the Wallace Collection give a lecture on the way an oil reviver applied to a marquetry surface made the wood go dark and the marquetry pattern almost impossible to see. I have struggled many times myself to clean or remove degraded oils from wooden surfaces.
So for now, I think I’m going to avoid them in my work regardless, just to be safe. There are other tools in my tool belt now. For me (and many others I know), I like having built this understanding of what the problem is I’m trying to solve and then trying to make the best decisions about which tools to use. My hope is that by sharing my understanding you can make informed choices as well, or at least understand what’s going on.
I have to thank Nelly and Marine for letting me into their workshops and showing me their techniques. That experience really sent me down the road of trying to better understand what’s going on. And I’m sure there’s much more still to learn.
If you want to know more about light and wooden surfaces, I’m working on a video series called Finished with Liz Duck-Chong that will explore more in depth some of these topics.

-Shane Orion Wiechnik is a trained furniture conservator/restorer in Australia. His work is dedicated to the practice and education of historic crafts, restoration, and modern conservation techniques. You can find out more about him here.
Fine Woodworking Recommended Products
Diablo ‘SandNet’ Sanding Discs
While Diablo’s SandNet disks perform similarly to conventional paper abrasives in terms of material removal and surface prep (with some exceptions at the lower grits), they make keeping your work surface and work area clean much easier, thanks to the great dust collection possible with them.
Foam Brushes
Foam brushes are great for applying a variety of stains and finishes, and the 2″ wide brush is the most versatile. Comes in a pack of 48.
Bumblechutes Bee’Nooba Wax
Ease of Use = Very good
Sheen = Very good
Appearance = Very good
Non-Yellowing = Very good
Water/Stain Resistance = Excellent
Sign up for eletters today and get the latest techniques and how-to from Fine Woodworking, plus special offers.

