

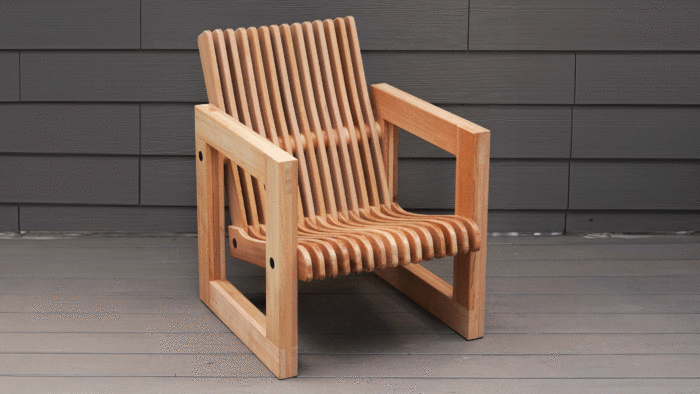
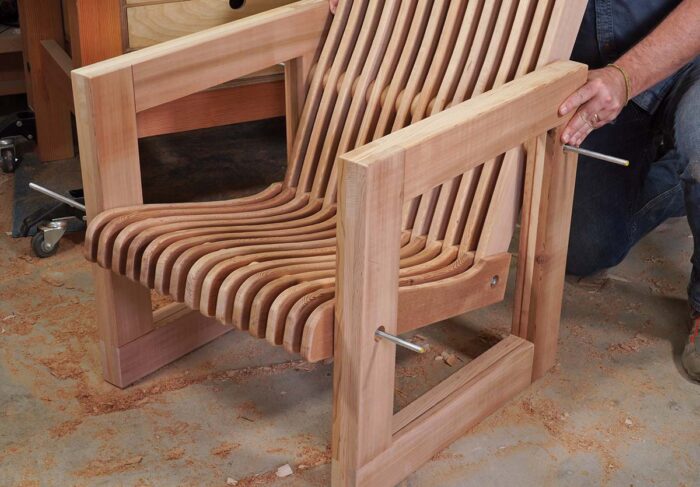
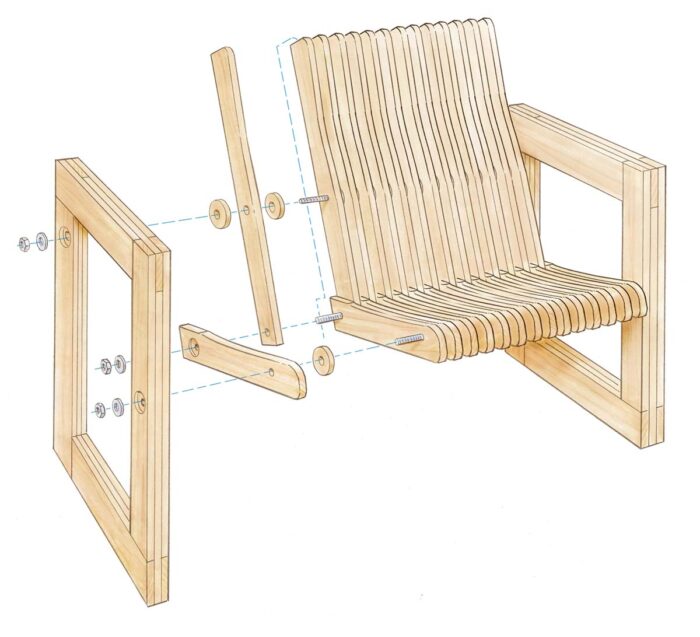
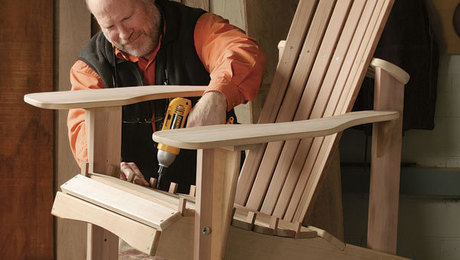
This chair is held together with long threaded rods (plus nuts and washers), which not only make assembly easy but also make the chair indestructible. It’s a great example of how sturdy, stylish pieces don’t have to take weeks or months to build.
Because the bolts and nuts can be tightened at any time, they guarantee that the chair will stay as solid as the day you built it, no matter how much the wood shrinks and expands outdoors.
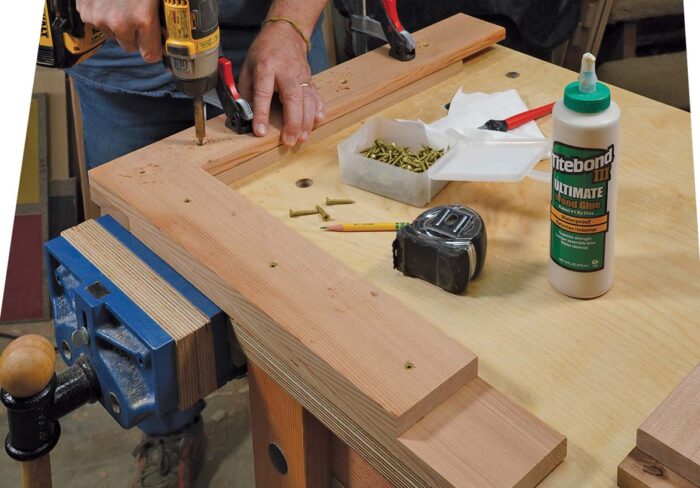
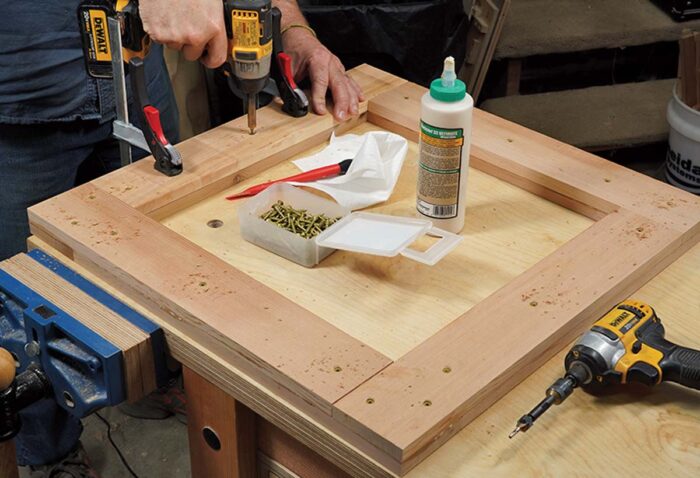
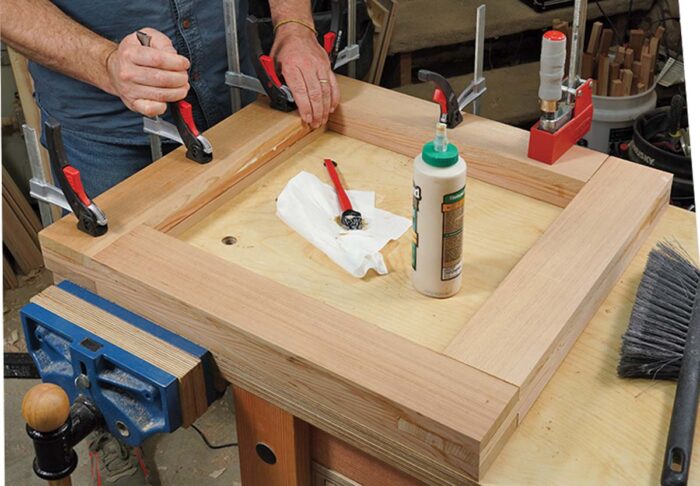
The bolts are also key to the chair’s comfort, passing through the two side frames to align a series of template-routed slats that hug the sitter’s butt and back. Those frames are easy to build, by gluing and screwing together overlapping layers of the same 3⁄4-in.-thick cedar the slats are made of.
I like the way the rows of thin, curved slats catch the eye. While the chair is very comfy as is, if you plan to spend hours hanging out or reading in yours, as I sometimes do, try adding flat, firm cushions to the seat and back. The cushions can always come indoors when it rains.
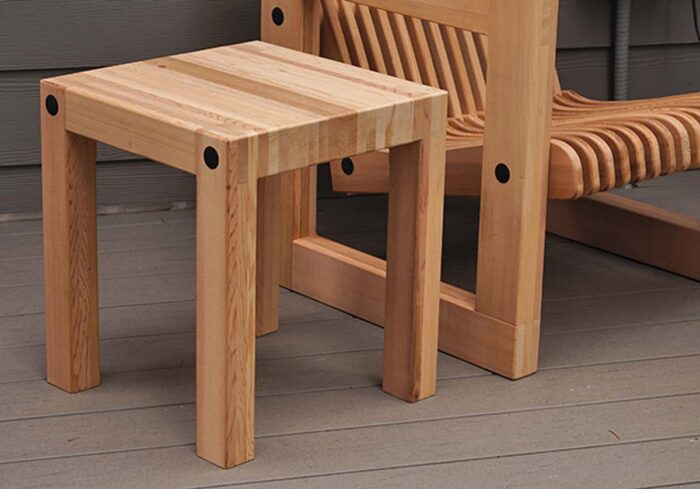
I also designed a simple side table to accompany the chair, assembled in much the same way. The plan for that table is an online extra, available at FineWoodworking.com/309.
Material matters
I love eastern and western red cedar for outdoor projects. It’s light, strong, good looking, and very resistant to decay. Just be sure to avoid the creamy sapwood, which does not have the same rot-resistance as the darker heartwood. Do that and you can skip the finish, letting the wood weather to a nice silvery gray.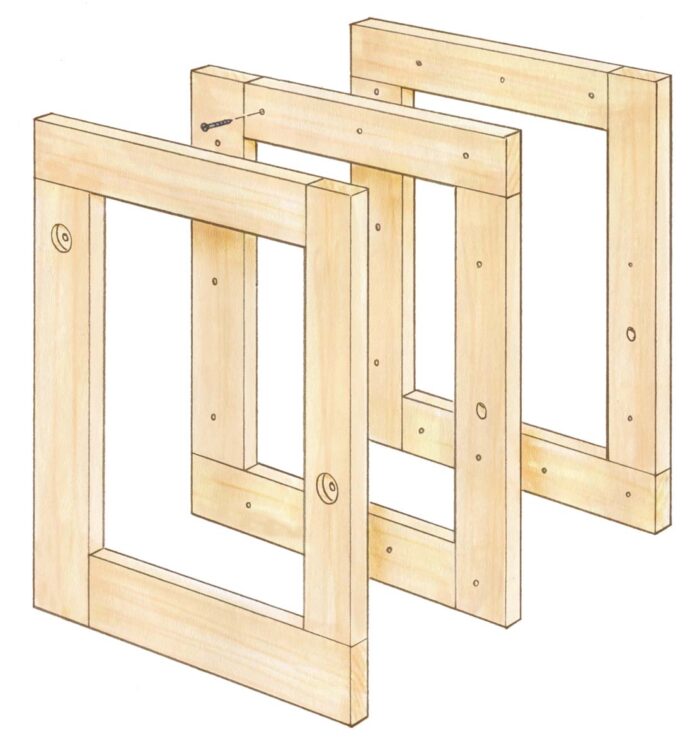
I used 3⁄4-in.-thick cedar throughout, but 1-in.-thick material would also work well. Whichever you choose, note that the frames must be made from material of consistent thickness, as must the slats and the circular spacers that divide them. Also, the goal is to have the seat end up around 19 in. to 21 in. wide, so if you use material thicker than 3⁄4 in., you will need fewer slats than the number shown in the drawing.
By the way, since all of the parts are relatively short, I saved a lot of cash by buying cedar cutoffs from a local wood reseller.
|
|
|
|
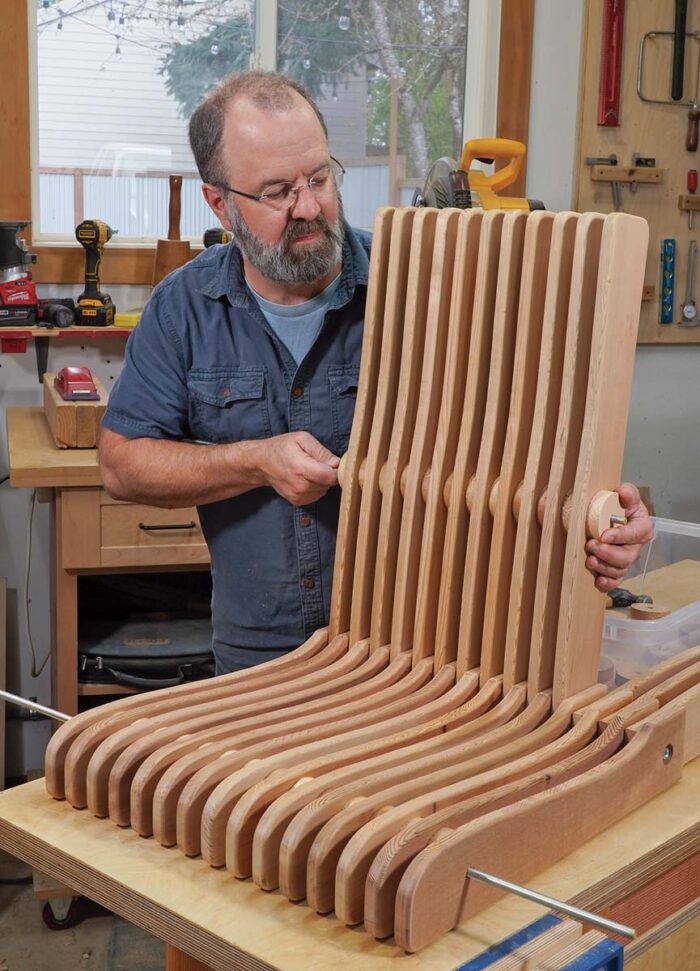
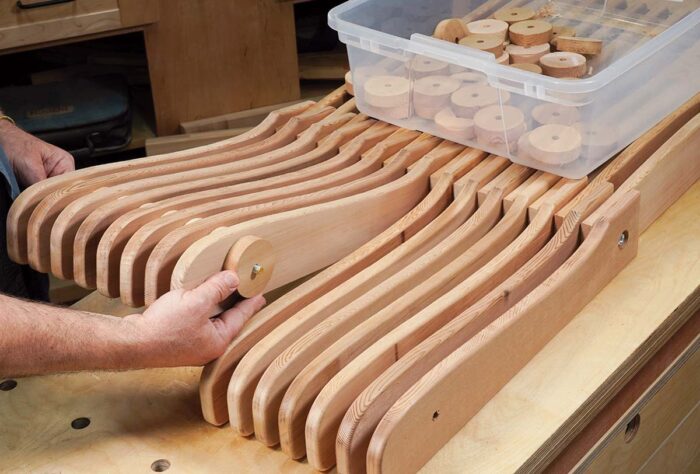
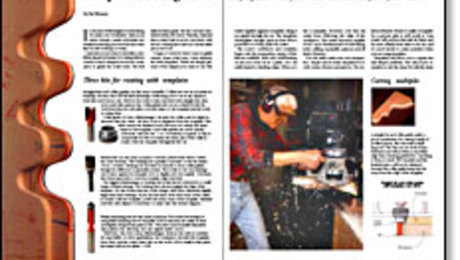
Template-routing delivers matching slats
The most time-consuming part of this project is bandsawing and template-routing the big pile of seat and back slats. But this goes pretty quickly once you make a 1⁄4-in. MDF or plywood template for each.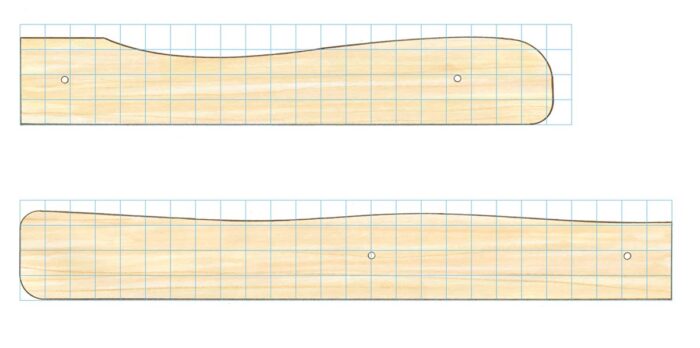
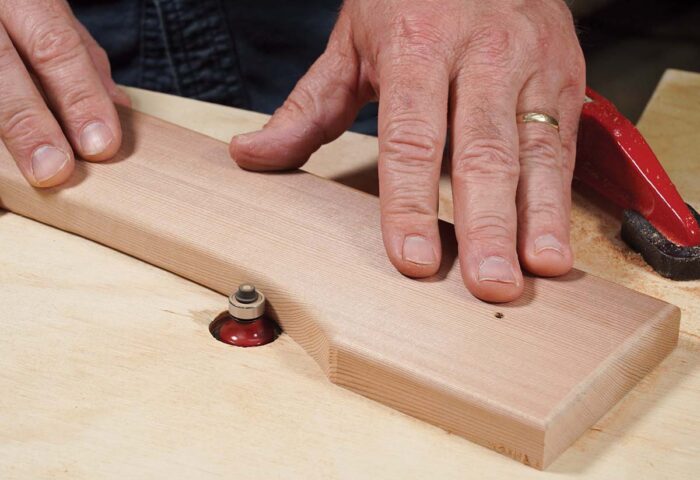
The templates are screwed directly onto each slat for routing, and the screws are placed right where the threaded rods will pass through, leaving perfect starter holes for a larger drill bit later. This ensures that the slats will line up perfectly in the chair.
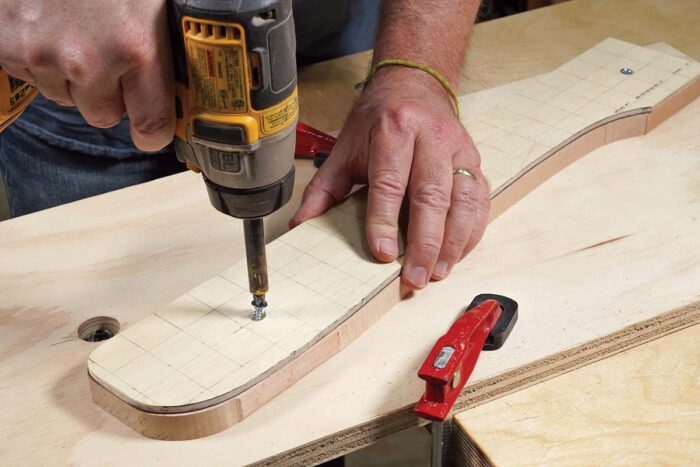
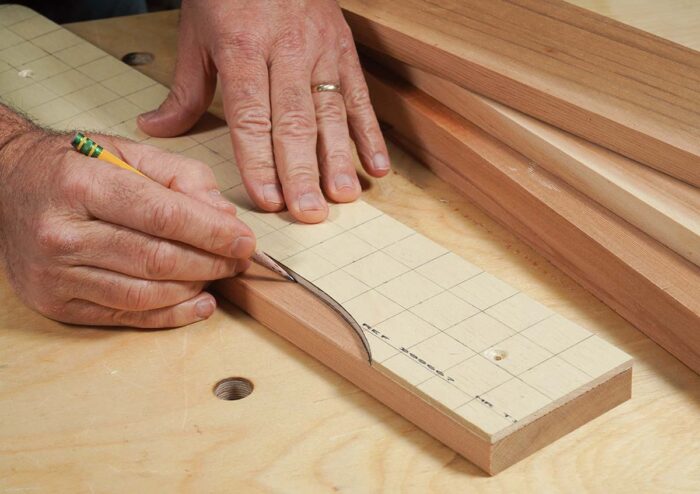
The template pieces and slat stock start at the same overall length and width, so one will be easy to align on the other. Use the 1⁄4-in. to 1-in.-scale grids on the opposite page to lay out the templates, and try to keep the curves as smooth as possible. I used a compass, a French curve, and a long, bendy stick to draw mine, and smoothed them on my benchtop sander. Don’t forget to mark and drill small holes for the attachment screws.
After template-routing all of the slats, use a 3⁄32-in. roundover bit to ease all of the edges. Last, drill and counterbore the slats for the long threaded rods. I started with a 3⁄8-in. twist drill on the drill press, which follows the little screw holes left behind in each slat. Then I opened up these holes a little with a 25⁄64-in. bit. Note that the holes at the back of the two outermost seat slats need counterbores as well, because their long bolts end right there with nuts and washers.
 |
 |
Fun with circles
There are spaces between the chair slats, so some sort of filler blocks were needed to keep the spacing even and the chair solid when the bolts were tightened. I thought about making those spacers square, but that would have required that each block be carefully aligned during assembly to create a cohesive look.
Then I remembered my favorite drill-press accessory, the General Tools No. 55 circle cutter. Unlike a hole saw, which is really a contractor’s tool, designed to cut rough holes in framing lumber, the General No. 55 cuts very clean holes up to a whopping 7-7⁄8 in. dia., and is infinitely adjustable in its range. Even cooler, when you reverse its cutting bit, the No. 55 will cut smooth circles just as well, which are perfect for this project.
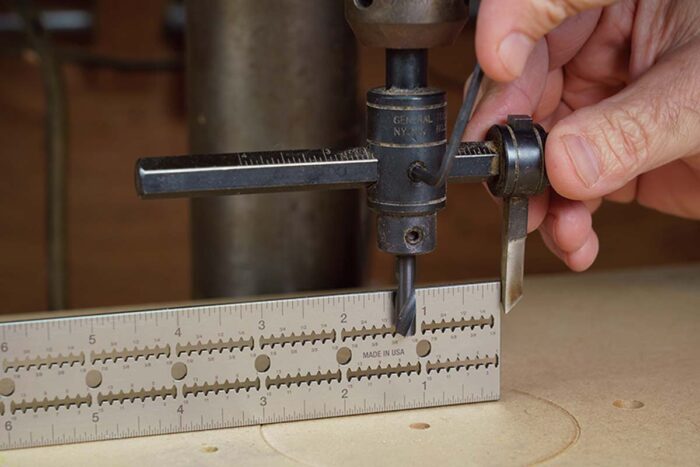
There are some important safety rules, however. First, the circle cutter must be used in a drill press only—never in a handheld drill. Second, the workpiece must be clamped securely. Last, keep your hands well away from the whirling arm.
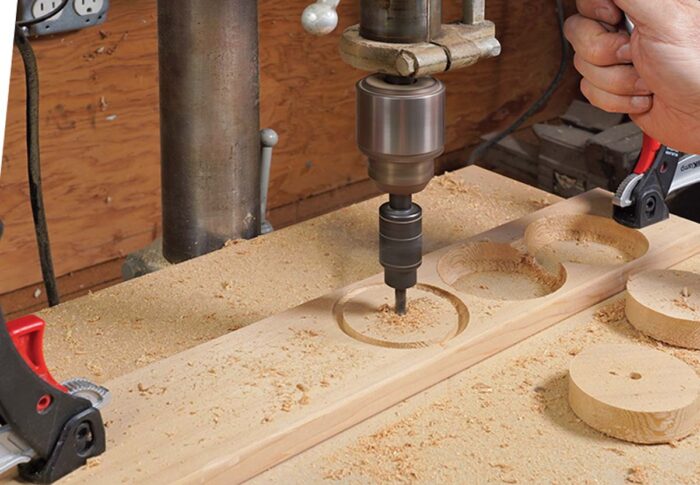
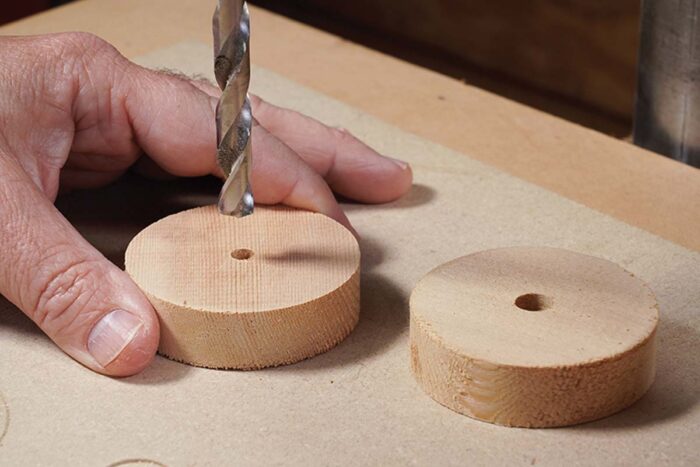
By the way, the drill bit on the circle cutter makes a hole in the center of each circle. So all I had to do was widen those holes afterward with my 25⁄64-in. bit, and they were ready for the bolts to pass through.
Assembly is quick and easy
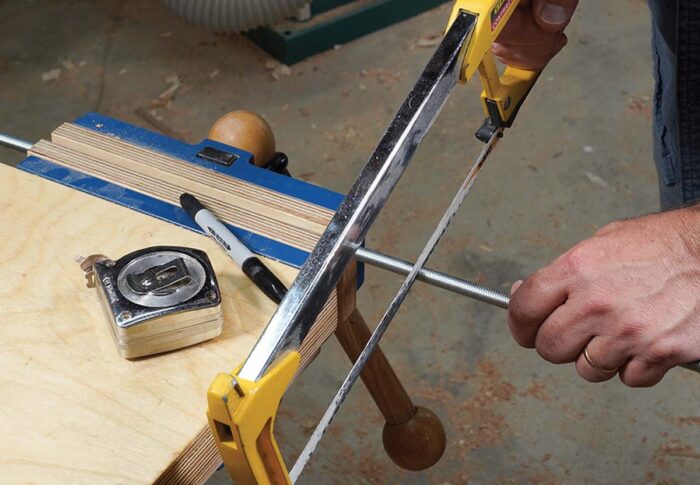
The threaded rods come in 3-ft. lengths at most home centers and hardware stores. You’ll need three. When cutting the rod to length, note that they need to end up roughly 1⁄8 in. short at each end so they don’t stick out of their counterbores. I covered the bolt holes with plastic caps (from Amazon), but feel free to omit the caps and embrace the look of exposed hardware.
|
|
 |
Asa Christiana is FWW’s editor-at-large, and the author of a number of books for new and intermediate woodworkers.
Sign up for eletters today and get the latest techniques and how-to from Fine Woodworking, plus special offers.